Oldsmobility.com - Your 1967 Olds Cutlass / 442 Headquarters


Nineteen Startling Chevy
12-Bolt Differential Tips
By Wayne Scraba

Photography: Wayne Scraba   -  Brought to you by Hot Rod

While the actual housing plays a major role in the creation of a bulletproof 12-bolt, the ancillary hardware is also critical. So is the setup. Given this situation, we talked to both Mark Williams of Mark Williams Enterprises (which manufactures a vast array of 12-bolt components) and Peter Wille, owner of Victoria Automatic Transmission Service and an expert on high-performance rear axle setup, for their input and suggestions. What follows is a wealth of information on how to "bulletproof" your 12-bolt.

Tip 1:

When it comes to high-performance GM axles, forget about C-clips. Use this: The housing end is a Mark Williams "small GM" design that incorporates the largest-diameter bearing possible for a 12-bolt Chevy. The bearing (typically, a large-diameter 45mm bore sealed assembly) greatly improves axles’ strength. The bearings are pressed onto the axles and held in place with the large C-shaped retainers shown in the photo. M-W uses studs pressed into the housing end to hold the bearing retainer in place. All hardware is aircraft-quality.

Back Home

Tip 2:

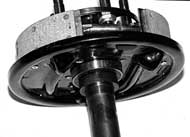
This photo gives you an idea of how the bearing is pressed on the axle flange and how it’s held in place. In this case, the axles were ordered from Mark Williams and so were the bearings. M-W installed the bearings on the axles as part of the process. When used with a dedicated housing end (such as the one shown in the first photo), the bearings come equipped with an O-ring seal on the outer diameter. This means there are no "extra" seals to worry about. It’s also important to note that when using a large-diameter bearing such as this, the opening in the backing plate will require enlargement. It’s a simple matter for a machine shop to increase the size of the opening.

Back Home

Tip 3:

You’d think that locating correct bearings for a rear end would be easy. Sorry, it simply isn’t so. If you do your homework, you’ll find an alarming number of "offshore" imports masquerading as real bearings. Finding high-quality bearings locally can become a frustrating experience. Because of this fact, Mark Williams Enterprises has introduced "ring and pinion installation kits." These kits make use of high-quality, made-in-the-USA Timken bearings throughout. When searching the local bearing supply outlets, don’t take second best. The good stuff only costs pennies more, but the difference in quality is staggering.

Back Home

Tip 4:

Believe it or not, there’s more to selecting a ring and pinion for your 12-bolt than choosing the gear ratio. For example, Richmond Gear offers "street gears" and "pro gears." The Richmond street-series gears are actually softer than OE-issue ring and pinions, while the pro series are softer still. Rockwell hardness tests of OE production line gears reveal a minimum Rockwell "C" specification of approximately 59 to 60 with a maximum figure of 65. The Richmond "street" gears register approximately 58 to 59 on the Rockwell scale with a maximum of 62. "Pro gears" (series 79) will register approximately 52 to 56 on the Rockwell "C" scale. Why incorporate a "soft" construction for high-performance gears? The reason is impact loading. When a relatively high amount of shock loading is introduced into a conventional "hard" ring and pinion, the gears can shatter. Softer construction allows for a certain amount of tooth "bending," but this certainly is preferred over shattered teeth. Because of the differences in Rockwell hardness, gears destined for drag race use only ("Pro" series) are not appropriate for street or street-strip use. The gears wear rapidly because of the softness. Due to this, all cars likely to see some amount of street use should make use of street gears.

Back Home

Tip 5:

The vast majority of drag race cars use a "spool" instead of a differential. The spool is a simple piece of equipment that provides a solid link between the ring gear and the axles. Because of this, both wheels receive an equal amount of torque, all of the time. If you decide to run a spool on the street, remember that the car could be a handful when the streets are slippery. Furthermore, the spool places a considerable load on the axles. Don’t be tempted to run a spool without proper aftermarket axles!

Back Home

Tip 6:

What type of lubricant is recommended for the 12-bolt? According to the experts, there are no trick lubricants for Posi-traction-equipped 12-bolts. Just use a high-quality, name-brand oil (Pennzoil is shown in the photo) or good old-fashioned GM lube--both are designed for use with Posi-traction carriers. To fill the assembly, level the housing, pull out the filler plug (found at the passenger side of the housing, ahead of the inspection cover), and add the lubricant. Be careful, as it can overfill easily. Two quarts plus a small bottle of GM Posi-traction additive is almost perfect. If any more lube is added, it will run out of the filler hole.

Back Home

Tip 7:

The rear bearing caps found on stock 12-bolt rear axles are relatively fragile cast-iron pieces. Because of the nature of a ring and pinion, the torque forces of the powerplant will try to push the carrier outward, placing additional strain on the driver-side bearing cap. Although this might at first be difficult to envision, think of the phenomenon like this: As the car accelerates, the ring gear attempts to climb out of the case or housing. To solve this problem, replace one or both of the factory caps with an aftermarket billet steel model (Mark Williams and others offer them). If installing a single cap, then be sure to replace the driver-side carrier bearing. With the cap(s) in place, ring gear life is improved dramatically.

Back Home

Tip 8:

It might come as a surprise to you, but a stock Chevy intermediate/compact wheel stud size of 7/16-inch is not adequate for any vehicle destined for high-performance or competition use (even mild competition). All high-performance applications should have their studs replaced with a minimum 1/2-inch stud. Companies such as Mark Williams do not offer axles in the 7/16-inch stud form and supply all axles drilled and tapped to accept 1/2-inch or larger studs. Proper studs are fashioned from Grade 8 materials and are threaded all the way to the head. Because of this feature, the bolt can be fully engaged in the backside of the axle.

Back Home

Tip 9:

Don’t discount the fact that the pinion yoke is the potential weak link in the rear end chain. Most OEM GM yokes are plenty fragile cast-iron pieces, and for the most part they can’t accept a large-diameter, bulletproof universal joint. A sound solution is this 4340 forged steel yoke from Mark Williams. Following forging and heat-treating, the yokes are CNC-machined to exact tolerances. Each yoke is symmetrical for balance and alignment. Special snap ring grooves also allow for easy U-joint installation. Finally, they’re designed to accept a massive, almost indestructible Spicer 1350 universal joint.

Back Home

Tip 10:

When setting up ring and pinions, you’ll often hear the term "balanced pattern." What does it mean? According to Peter Wille, it’s when the "wipe" of the pinion gear against the ring gear is equal on both sides of the ring gear tooth. Having a balanced pattern simply means improved gear life, but a side benefit is less noise. In addition, a proper pattern will look like a relatively long, smooth oval, and it should slightly favor the toe or the inside of the ring gear. Why should the pattern favor the toe side of the ring gear? In a typical hi-po situation, the pattern will "stretch" under loads (which can be quite high, especially if there is some power under the hood and some hook at the back end of the car). In essence, this pattern reaches from one end of the gear tooth to the other (from the toe to the heel). If the pattern favored the "heel" or the outside portion of the ring gear, then there’s a good chance that the "pattern" or true contact area woulds go right off the end of the ring gear. By the way, a pattern that favors the toe or inside of the gear tooth will be somewhat noisier than a heel pattern, but in this case that is a small price to pay for reliability.

Back Home

Tip 11:

When it comes to axles for your 12-bolt, keep in mind that there are major differences between street axles and race car axles (although they may in fact look the same on the outside). The primary differences are in the axle metallurgy. You see, a street-driven car is often heavier and must operate under much more severe road conditions than a race car. If incorrect axles (dedicated race axles or some OEM-style race axles) are used in a street car application, there is a risk of breaking the axle flange.

Back Home

Tip 12:

Axle splines are important, too. In stock form, a 12-bolt is equipped with a 30-spline axle. In comparative shear strength, a 35-spline axle (using the M-W spline as an example) is 89 percent stronger. Those calculations are based upon the physical dimensions of the spline itself and don’t take into account the considerable added strength of an aftermarket forging. The bottom line? If you want to increase axle strength, increase the spline count.

Back Home

Tip 13:

If a "spool" locks the rear axles together, how does a differential work? Internally, a differential is connected to the axle by way of a series of splines. In essence, the axles are connected via the splines to the axle gears or "side gears" inside the differential case. The side gears are engaged by the pinion gears or "spider gears," which are mounted on a common shaft assembly. Moving in a straight line, the pinion gears are stationary; there is no turning action on the pinion shaft. The side gears are driven equally, but when the vehicle turns, the pinion gears turn on the shaft. One half or side of the carrier then speeds up while the other slows down. The result is a smooth turn without one tire spinning. The purpose of the Posi-traction unit is to maintain additional force so that the pinion gears remain stationary unless absolutely necessary. When engine torque and power are supplied in a straight line, the clutches lock and drive both sides of the carrier equally, but when the vehicle is turning, the clutches become "unlocked," allowing for the previously described smooth turn.

Back Home

Tip 14:

Recall the old method of determining if a car had Posi-traction? You remember: Lift it off the ground, turn one wheel, and watch the relationship of the other wheel. Well, that "system" isn’t always foolproof. The best method (and the only accurate one) is to remove the rear cover and inspect the works. A Posi-traction axle will have clutches visible inside the carrier (carriers have large openings where the clutches and differential gears reside). An open axle will not have clutch packs.

Back Home

Tip 15:

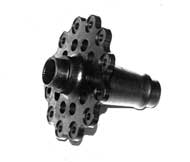
When shopping for 12-bolt differential parts at a swap meet, keep this in mind: Chevrolet generally used three different types of differentials for the 12-bolt: the Two Series carrier, the Three Series carrier, and the Four Series carrier. The "Two Series" has little use in a hi-po application and should be avoided if at all possible. The Three Series carrier accepted ring and pinions that ranged from 3.08:1 to 3.73:1, while the Four Series carrier accepted ring and pinions ranging from 3.90:1 to 6.14:1. While there are a number of subtle variations between the three types of carriers, a major difference is the thickness of the gear flange. Two Series carriers are the thinnest, while Three Series flanges are thinner than Four Series flanges. Because of the size of the flange, the carriers cannot be randomly used with ring and pinion sets from the trio of "families" (unless, of course, special gears with custom ring gear mounting surfaces are used. These special gears are readily available from Richmond Gear). Additionally, the Two Series carriers do not have any webs on the top of the carrier. Three and Four Series carriers do have webs.

Back Home

Tip 16:

When setting up a 12-bolt Chevy rear axle, be careful when setting the carrier bearing preload. Too much bearing preload will kill the bearings almost instantly. Too little preload will cause the carrier to move back and forth. In order to check the preload, install an inch-pound torque wrench on the pinion nut and measure the preload without the carrier installed in the housing. Then repeat the process with the carrier installed. Installed, the pinion nut will require between 7 1/2 to 10 inch-pounds more force to turn than when the carrier was empty. By the way, preload is adjusted by adding or subtracting equal thickness shims to both sides of the carrier. Adding shims increases the preload. Removing shims decreases it.

Back Home

Tip 17:

In order to check backlash on a rear end, you have to set up a dial indicator against the ring gear teeth. Install the dial indicator in a plane that is perpendicular to a tooth, then wrap a rag around the pinion yoke. With a careful hand, gently move the ring gear with a back-and-forth movement (the pinion stays stationary). According to Mark Williams, the ideal gear backlash dimension is between .005-inch and .008-inch for a 12-bolt rear axle. Strip-only 12-bolts can be a bit tighter in the backlash department. In order to increase the backlash, remove shim material from the right-hand side of the carrier and add it to the left side.

Back Home

Tip 18:

Before you install a ring gear in your 12-bolt, use a whet stone to deburr the gear backside (where it mates the carrier). By "whet stoning it," you remove the imperfections. The corresponding surface on the carrier also should be inspected and treated to similar hand smoothing with a surfacing stone. Peter Wille takes an extra step and deburrs both the ring gear and the pinion gear teeth.

Back Home

Tip 19:

When you’ve finished rebuilding a 12-bolt, it’s best to break it in before you "pound" on it. Here’s a quick break in routine: Drive the car forward and in reverse several times. Then drive it around in circles in either direction. Listen for any unusual noises and watch for unusual vibrations. It’s also a good idea to jack the wheels off the ground and "warm" the rear lube prior to using the fresh rear end. Once this is done, the rear end should be ready for use.


OLDSmobility.com Related Links

Back Home

Back to the top
| Home |
| My Personal Project - Photo Galleries | Updates/Journal | Sign My Guestbook | View My Guestbook |
| 1967 Specifications - Model ID | Product Specs | General Specs | Engine | Tune-up | Torque |
| Vintage Ads | Vintage Road Tests | Technical How-To's | Owner's Registry | Messageboard | Links |

line.gif (839 bytes)

Want to link to this site? Please use this banner.
OLDSmobility.com - The 1967 Olds Cutlass and 442 Resource

The correct URL for this website is http://www.OLDSmobility.com/)
For questions, comments or suggestions, please e-mail me.
All content on this site is © 1999-2008 by OLDSmobility.com/Project 442 Clone, unless otherwise noted. 
All rights reserved.
This page last modified on July 28, 2001.